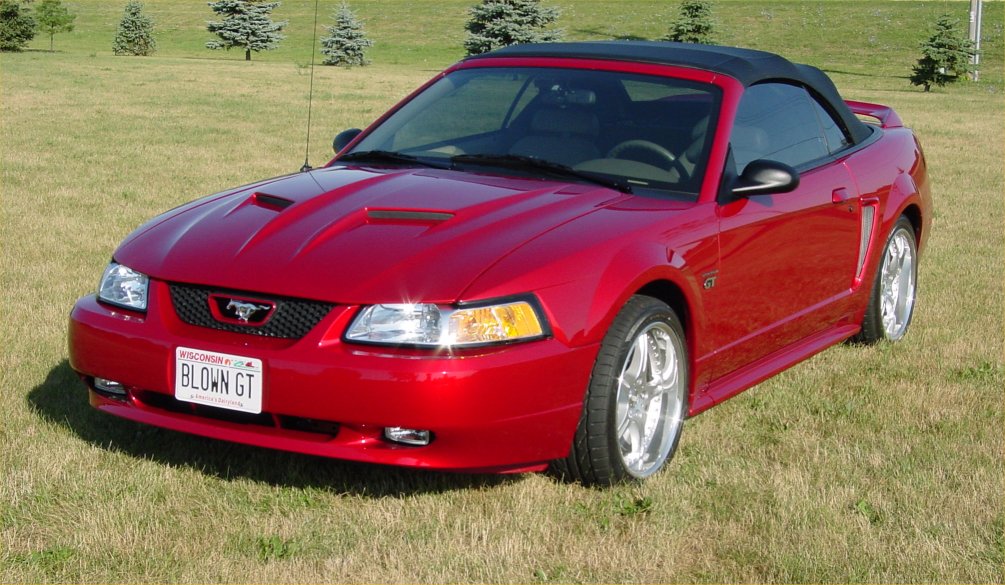
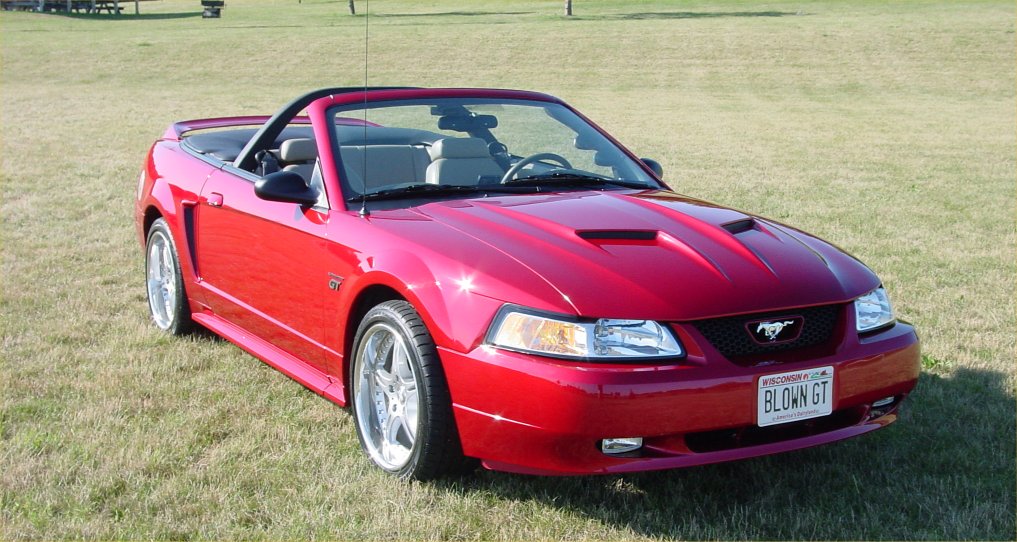
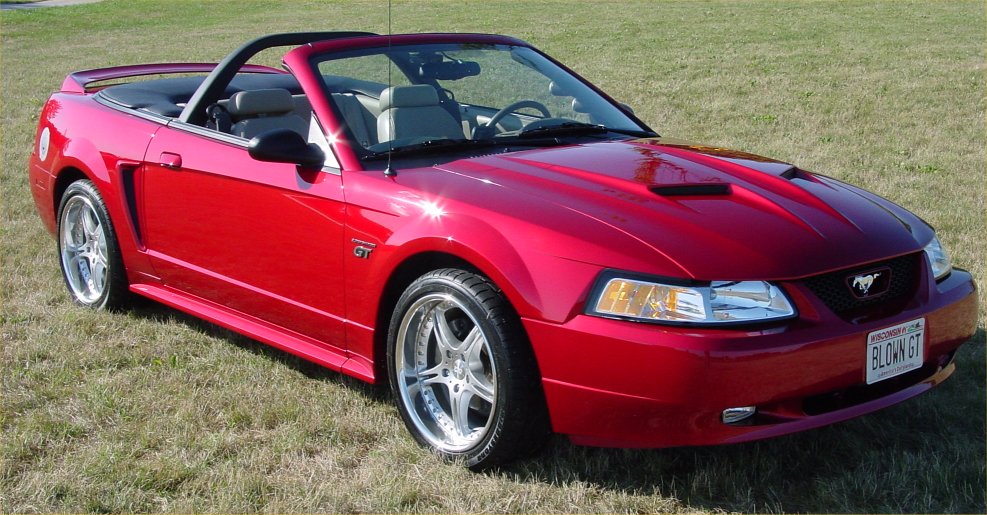
This amazing vehicle is currently for sale for $21,000 (Price Reduced). With over $70,000 invested in the build, an engine producing 534 HP, perfect condition, and very low mileage (23,000 miles), this vehicle is an outstanding opportunity. It also sounds as great as it drives. It can be seen at the offices of Digital Intelligence, 17165 West Glendale Dr, New Berlin, WI 53151. This is NOT just another Mustang with a bolt on blower! The entire engine has been rebuilt from the ground up to handle the huge increase in power produced by the Votech Supercharger (see details below). Engine components have been hand selected to not only ensure performance, but also longevity. Slightly dished forged pistons were installed to slightly lower the compression ratio and ensure long engine life. The engine computer has also been custom dyno tuned (twice) to ensure excellent driveability to complement its massive power. With the dramatic strengthening of the engine internals, there is plenty of headroom to add even more boost or Nitrous. This car was built as a show vehicle and never abused. (The aftermarket wheels even have the original rubber that came with them from approx 2002 if that tells you anything). Full documentation is included with the vehicle. This sale also includes transfer of the BLOWNGT.COM Web Site (domain) and BLOWNGT Vanity Plates (WI). Serious inquiries can contact Ed at 262-893-2230 or by email to "ed(at)blowngt.com"
(Click Any Photo for a Larger Image)
This vehicle was purchased in April of 2000. The windows were tinted right after the purchase. I have no problem installing a Supercharger, welding custom brackets for radar detectors, or wiring in a new head unit, but I am totally incapable of working with window tint film! (click for larger image)
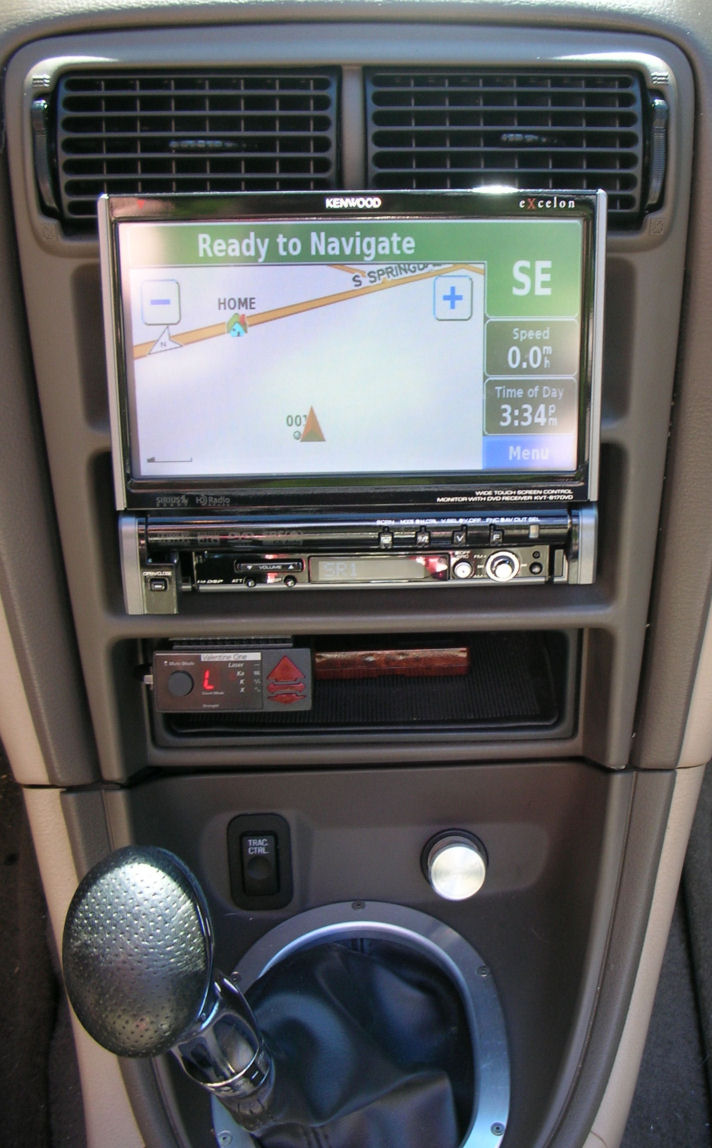
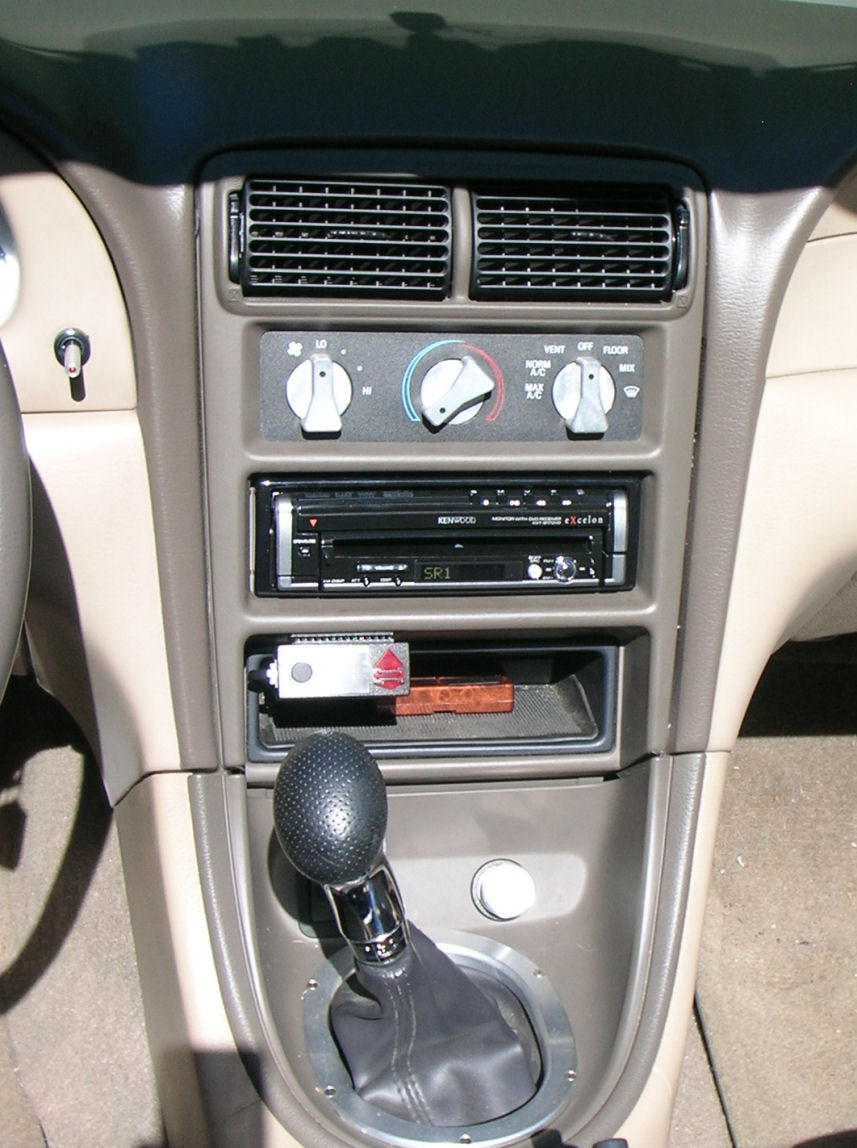
The first major modifications to be performed was an upgrade of the audio system to replace the factory Mach460 head unit and CD Player. After several iterations, over several years, the current unit is a Kenwood Excelon KVT-817DVD unit with a Kenwood (Garmin) KNA-G510 DVD Navigation system. Also worked into the mix are an XM XMD1000 satellite radio receiver, Kenwood KCA-iP500 iPod interface, and a PioneerND-BC2 Backup Camera. All of these components integrate directly back to the head unit for control and feed out through the stock Mach460 amplifiers. The head unit has a motorized 7 inch video touch screen which folds out and deploys when the unit is turned on and then slides back into the dash when the unit (or car) are turned off. (click for larger images)
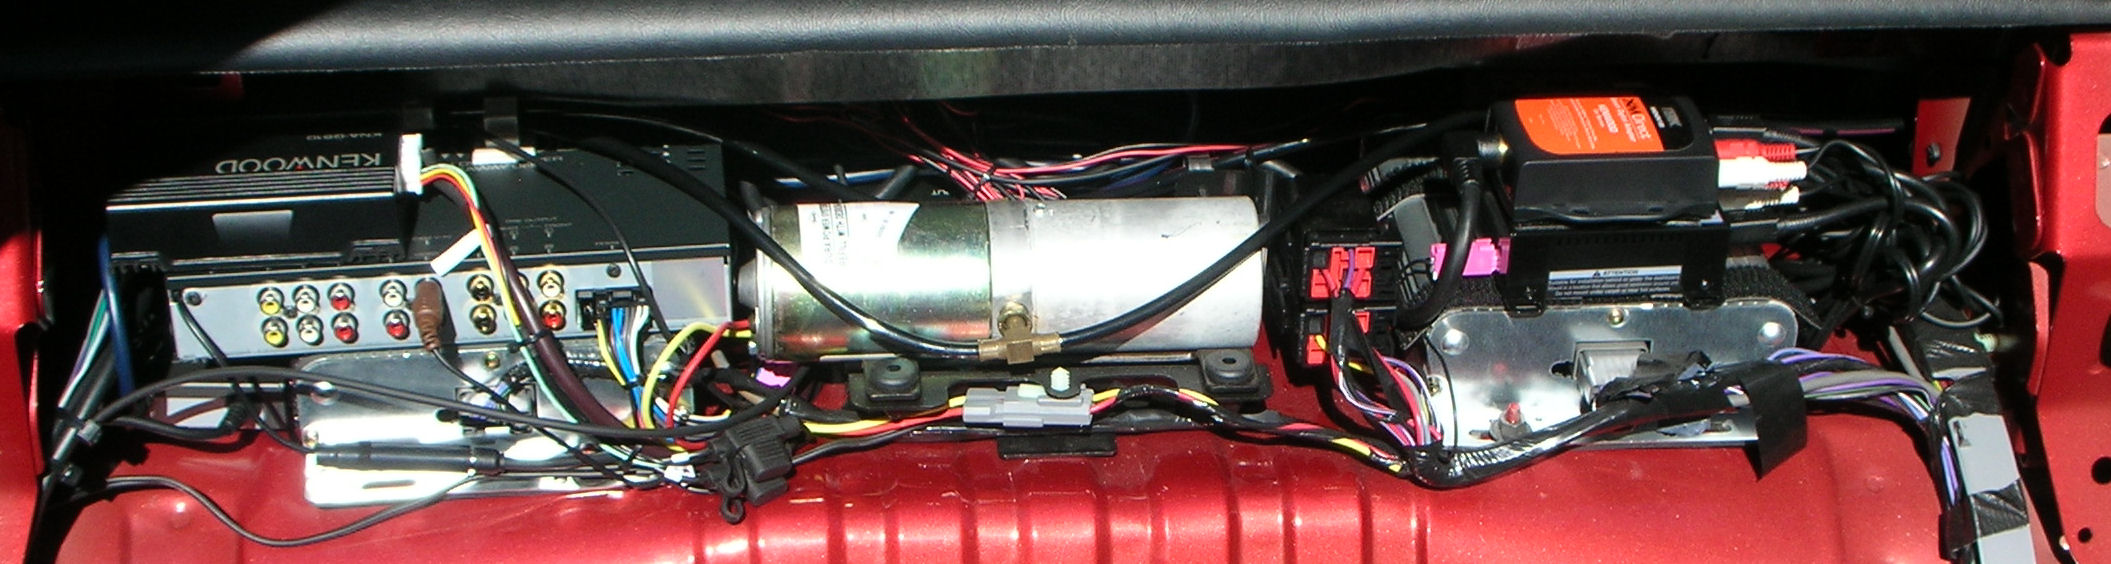
The head unit is installed in the standard DIN opening in the dash and the rest of the equipment fits neatly behind the rear seat, under the convertible top, and on top of the rear Mach460 Amps. The photo below is the view with the rear seat removed. In the left photo, you can see the KVT-817DVD Receiver unit mounted on top of the passenger side Mach460 Amp, with the KNA-G510 GPS unit on top of that. Barely visible, underneath and to the left of those is the KCA-iP500 iPod interface. On the right side, you can see the two XM Radio interfaces (XMD1000 / XMDKEN100) mounted on top of the driver side Mach460 amp. (click for larger image)
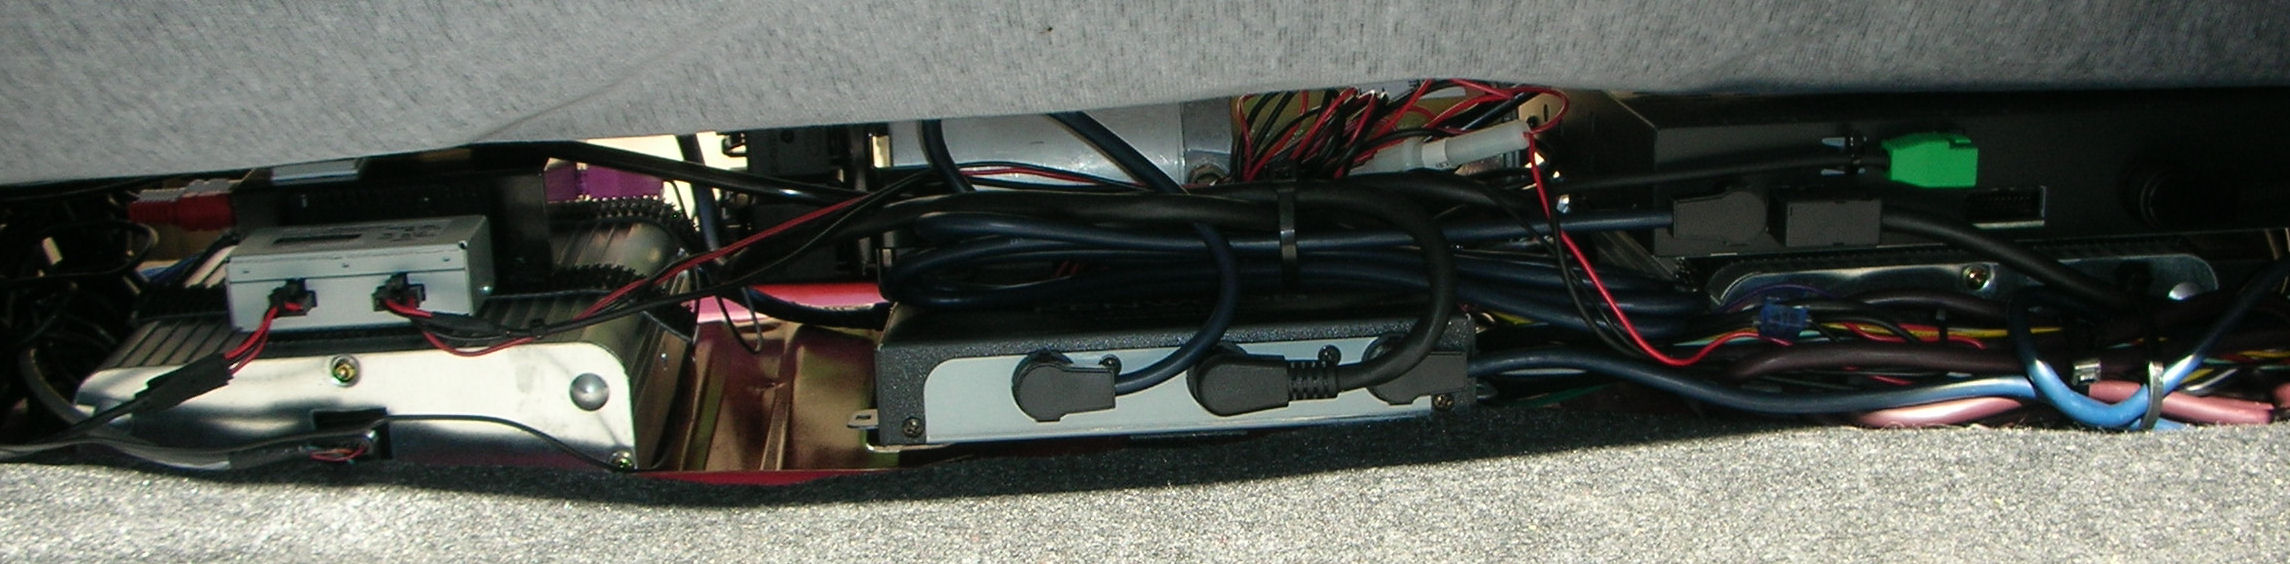
The photo below is looking forward through the trunk with the back panel removed. Its a little harder to make things out but you can see the Pioneer ND-BC2 backup camera video interface mounted on top of the drivers side Mach460 amp and the Pioneer KCA-S220A auxiliary input adapter in the center. The right side shows the back of the KVT-817DVD Receiver. (click for larger image)
Contrary to popular misconception, it is not necessary (or advisable) to install an inline adapter between a new receiver and the Mach460 amps. The "Scosche" adapter provided by Crutchfield is not only unnecessary, but would add yet another piece of hardware for the audio signal to pass through thereby reducing overall sound quality. (The factory head unit is manufactured by Sony and has a 12 watt output rating so you don't need to reduce output levels from an aftermarket head unit to line level - the Mach460 is already set for speaker level input!) About the only modification I had to do was put a 2200 ohm (Red-Red-Red) resistor between the antenna output of the new head unit and the Mach460 amp turn-on circuit. This provides a signal to the amps to power up when the head unit is turned on. The Mach 460 Amps apparently are looking for a 7.5 volt signal in order to power up. If too much voltage is provided (i.e. 12v straight from the power antenna or aux amp circuit on a head unit) you will get a pop from the speakers every time you turn on the amp. Since I no longer needed the CD player, I went back to Ford to order the little pocket tray so I could use the extra space in the dash. You can see the pocket in the dash photos above with a Valentine One Radar Detector remote unit mounted on the top left edge.
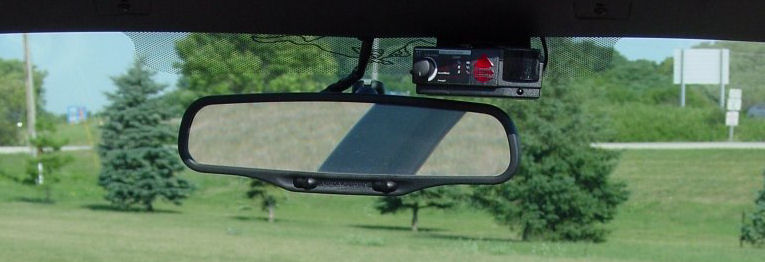
The Valentine One is absolutely phenomenal (and a MUST in this vehicle)! The small remote unit keeps the LED display below the dash to keep parasitic drivers off my rear bumper (if they get that close). The actual Radar unit is mounted to a custom "tee" shaped bracket I designed/welded using 3/4 inch flat stock and bent to perfectly mount to the underside of the headliner trim on the windshield. This is a permanent, unobtrusive mount, which keeps the unit as high up as possible (above the mirror) for maximum reception and still allows me to detach the unit from the bracket when necessary. The wiring, of course, is all permanently routed within the headliner trim, A-Pillar, and under the dash. You can see the Valentine One above the mirror in this photo:
You may also notice the Autometer Pillar Gauges (Fuel Pressure and Boost) on the driver's side A-pillar. Here is a close up of those gauges (click to enlarge):
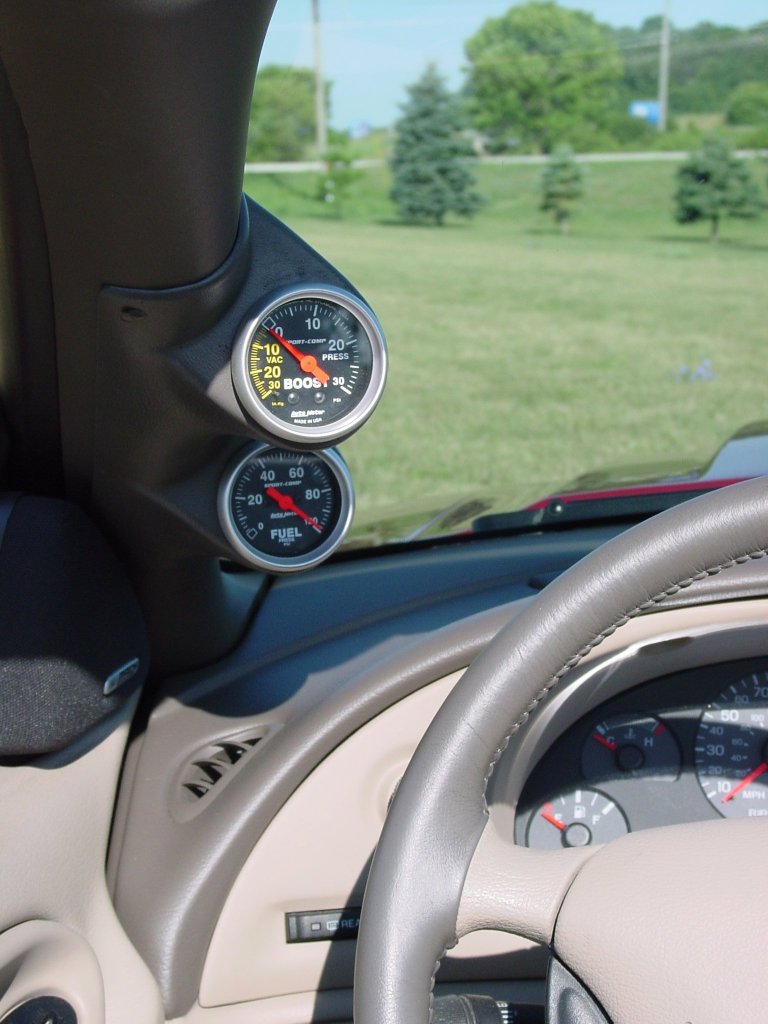
Of course, there's not much point in having a boost gauge without some sort of forced induction... After the installation of the Stainless Steel Bassani Exhaust System (X-Pipe and Cat Back exhaust) during the summer of 2000, I installed a Vortech 10 PSI Supercharger with Intercooler in December of 2000. The first thing I did was to get a battery relocation kit (battery box etc) and weld up a bracket to install the battery in the trunk. This was necessary to make room for the intercooler reservoir in the engine compartment. 3/4 Inch square tubing was used to fabricate the mounting frame. I painted the frame black and used a "crackle" finish dark gray paint on the battery box to match the carpeting in the trunk (which now has about as much room as a glove compartment). The installation took about a week (nice and careful) and other than a bad SuperChip from Vortech, went without a hitch. (I did the install between Christmas and New Years and simply could not get a hold of anyone at Vortech. Much Thanx to Tony a Need-4-Speed for calling me back (even though his shop was closed and he was out of town) to help diagnose the bad replacement chip). Tony's helpfulness and customer dedication always place him at the top of my list when looking for aftermarket parts.) Here are some photos of the engine compartment with the Vortech Supercharger installed. You can see the Intercooler reservoir where the battery used to be on the driver's side front of the engine compartment in the left photo. The right photo shows the Vortech Maxi-Cooler in the lower-left of the image. (Updated photos of the engine compartment can be seen below)

(Click any Image for Larger Picture)
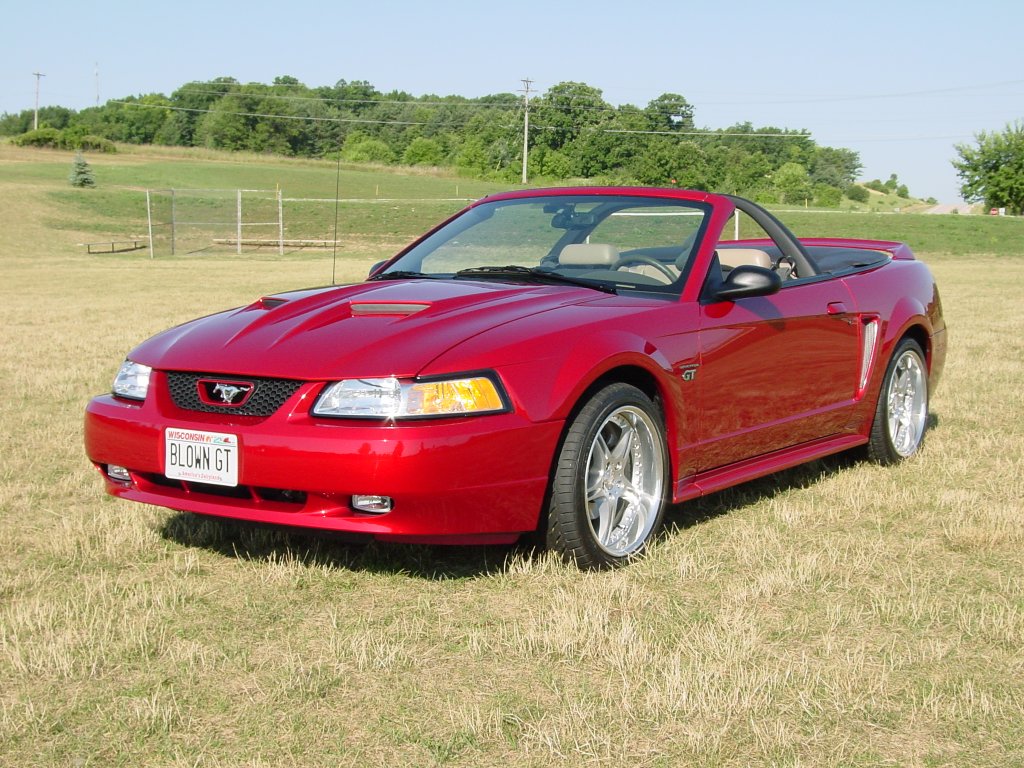
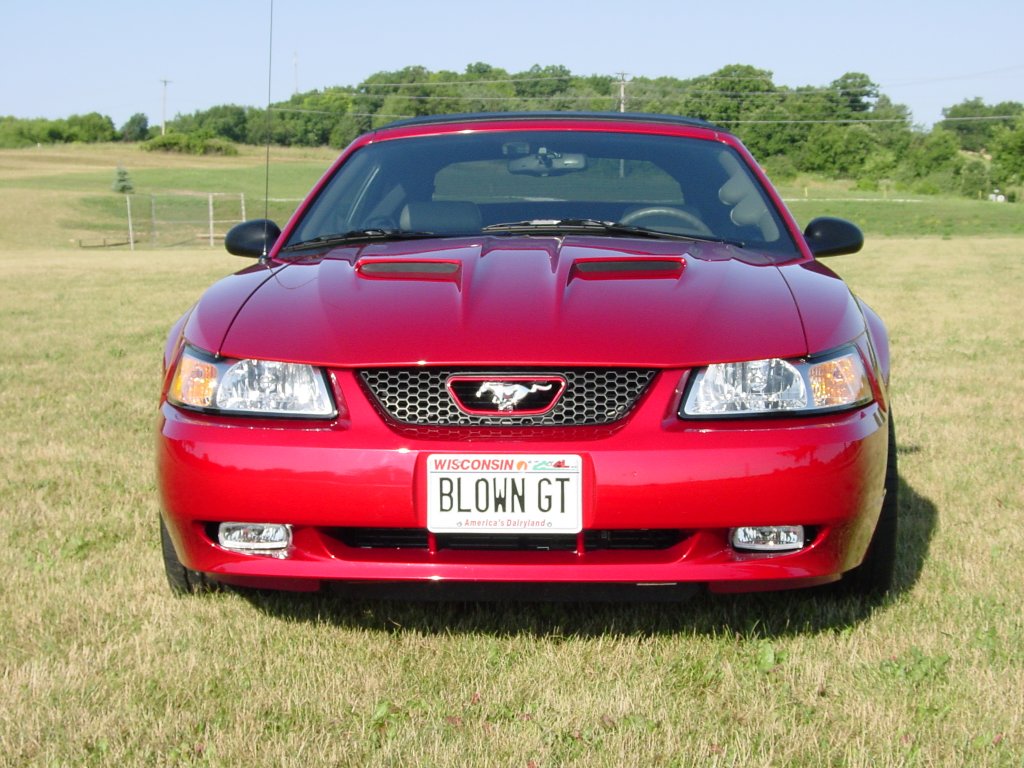
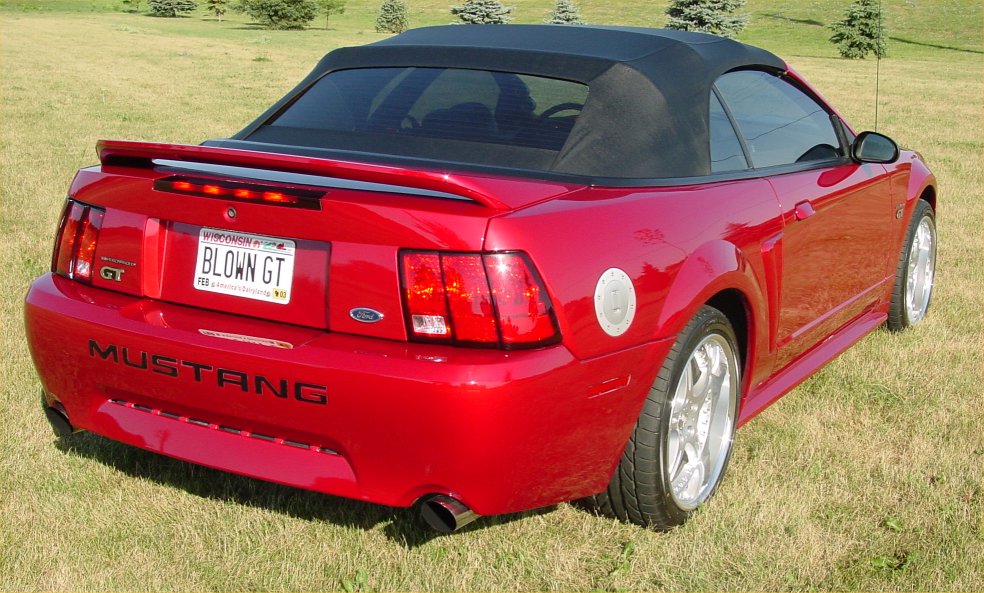
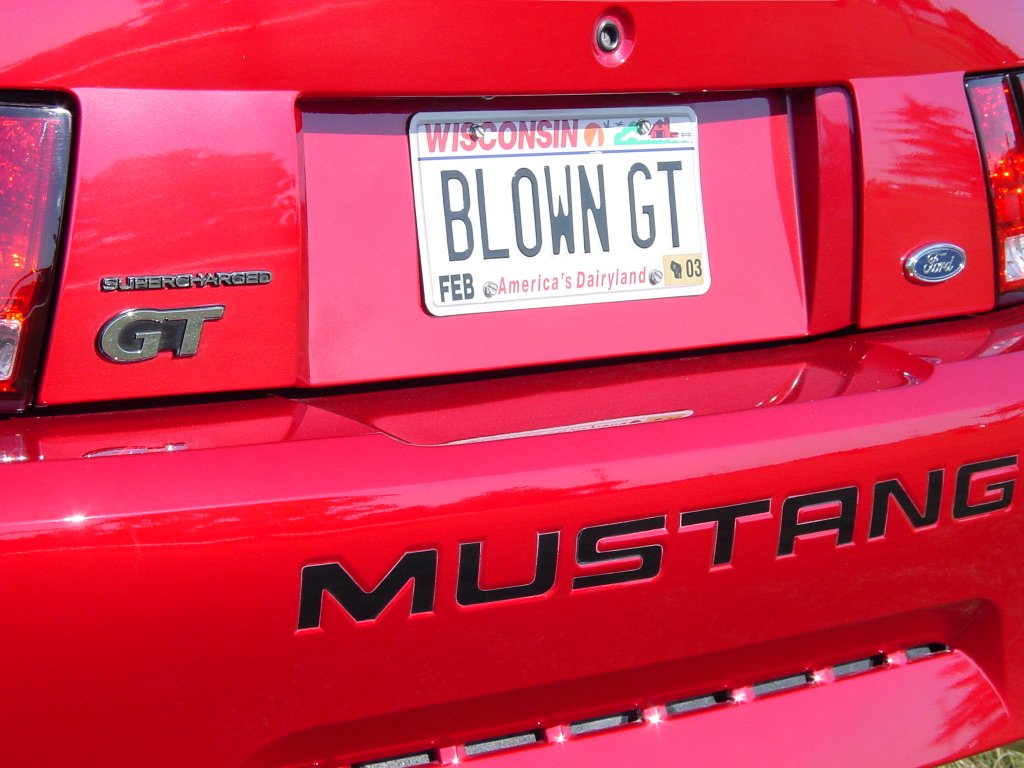
And of course, once you got a blower - you need to add a couple of badges to the car (front quarter panels and rear)...
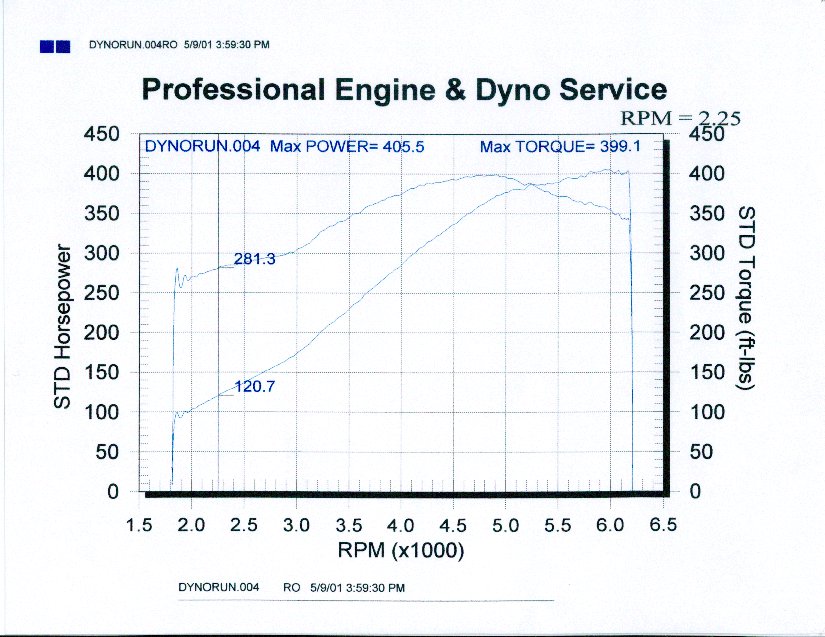
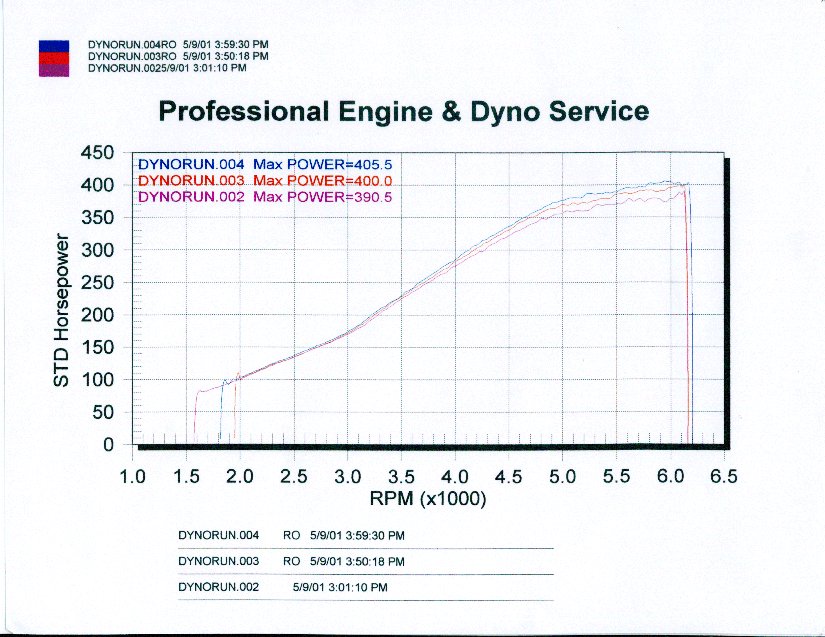
Although the Vortech kit ran well, I wanted to get a custom tune on the engine for maximum reliability and performance. Although performance is a high priority on this vehicle, I also wanted a car a could drive on a daily basis as well as thousand mile trips. Performance, Reliability, and Drivability are the goals for this vehicle. After doing much research on the web I decided on getting a dyno tune from Chris Johnson at Johnson Motorsports. Although it would be a 900 mile drive (each way) from Morgantown West Virginia to Mobile Alabama, I wanted to get the computer reprogrammed by the very best tuner I could find! Chris first sent me a "mail order" Autologic chip, 42lb injectors (to replace the Vortech 30# units which replaced the 19# stock units), and recalibrated my MAF. I then drive down to Mobile the day before my scheduled tune on the "mail order" chip (which ran great!). After making a dyno run on the "mail order" program (390 RWHP), Chris did a nice conservative optimization on the settings to get 405 RWHP. Allowing the standard 15% for drive train losses, this means the engine is now putting out about 465 BHP! If you've never seen your vehicle screaming at full throttle on a platform 4 feet off of the ground be advised its not for the weak of heart! I guess its sort of like watching your kid sky diving (Supposed to be safe, but...). Anyway, here are the charts. Best Run on left, HP in center, Torque on Right (click to enlarge):

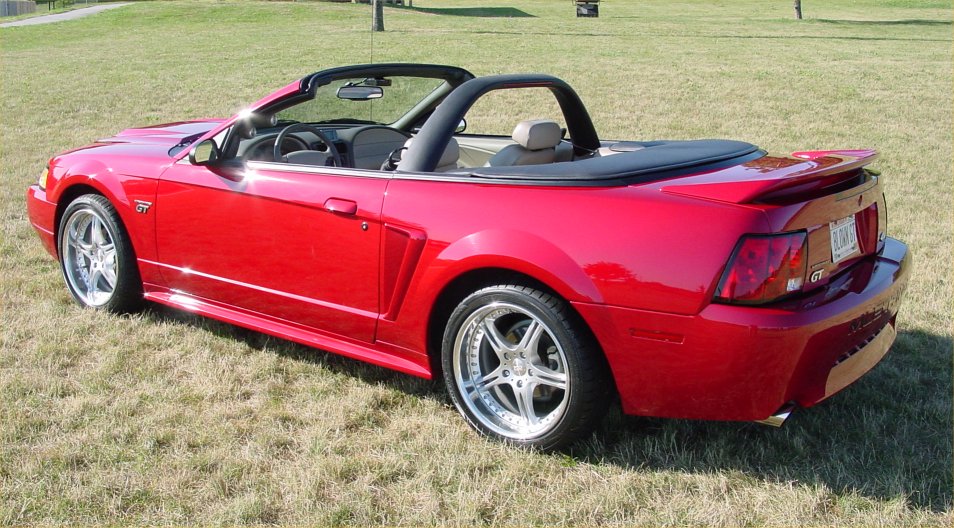
Now that the "Go" was in place, it was time to work on the "Show". I installed a Classic Designs Light Bar, Pro Fit fuel door, ATS Sequential Turn Signals, and Eibach Pro Springs in July and Hotchkiss Caster/Camber plates in August. The springs dropped the vehicle by about 1-1/2 inch all around and tightened up the suspension.

I also replaced the lame stock hood with a Cervini Stalker hood in July (click for larger image):
I wanted to install HID lighting in the vehicle but I didn't want to give up my high beams or suffer from poor beam focus due to installing an HID replacement bulb and ballast into a halogen filament headlight lens. I decided to replace the stock driving lamps with an Eagle-Eye HID Driving lamp kit. Although these lamps are pretty expensive, they are real HID lamps/ballasts, don't require modification to the stock halogen headlights, and definitely won't be confused with blue painted "xenon" bulbs!
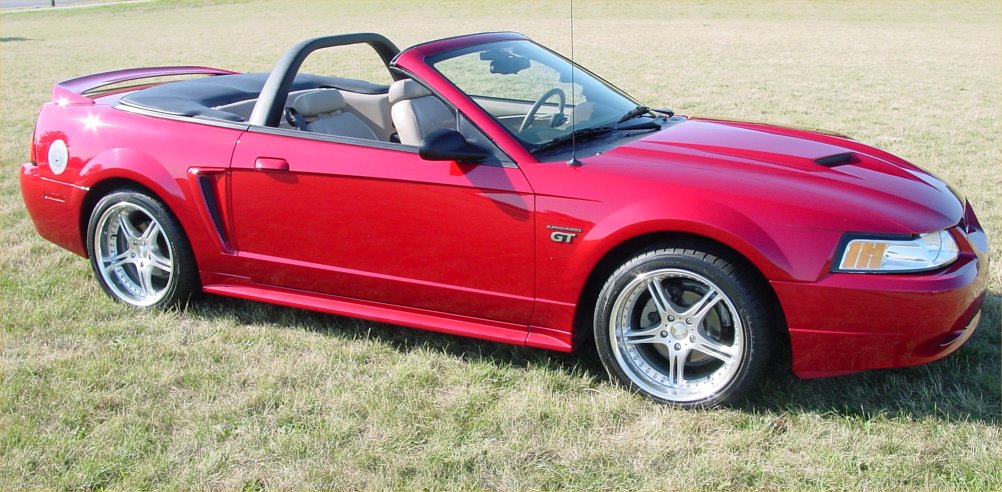
In the winter of 2001, Finally got some new dress shoes for the car! Four SSR GT-3 18x9 3-piece rims wrapped in Bridgestone 245/40YR18 S-03 Pole Position rubber were recently added. At that time I also applied an initial 6-step Zaino Brothers show car polish application
(Click on Image for Larger Photo)
The fall of 2002 saw a couple of major modifications: The HID Driving lights worked out so well I decided to upgrade the main headlight systems to HID as well. Four HID lamps on the front of the vehicle produce an amazing quantity of light on those lonely darks roads on long night trips. I did have to create a supplementary relay system so I could activate the HID Driving Lights using the high beam circuit. The trick was designing an electrical circuit to keep the main headlights lit when the High Beams were activated (normally only one filament is lit at a time). Since the main HID lighting systems have no provision for a high beam circuit, I now have the HID driving lamps aimed and functioning as the High Beams.
Bullet pedals were installed in place of the factory rubber tops. It was also time to put a little more aluminum trim in the cockpit to flush things out. Billet Aluminum AC, Headlight, Defrost, and Tilt knobs, Shifter Trim, Door, Window, and Cruise Control Switches, AC and Main Gauge Face Panels were all added at this time. A Momo Sphere Air Metal Shifter Knob was also added. Since I had the main gauge panel out, I also upgraded the display for white face, electroluminescent gauges.
June 2003 Engine and Drivetrain Modifications
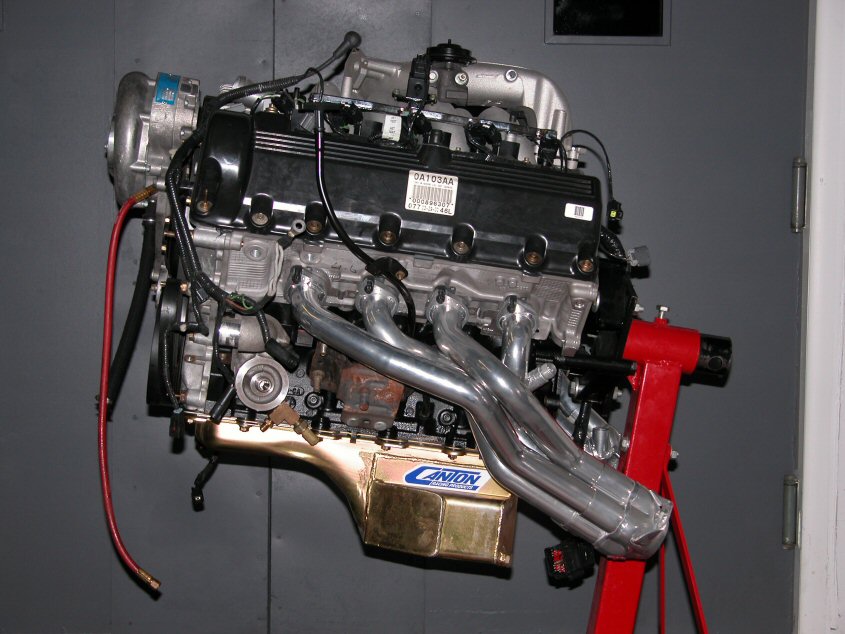
The car was driven down from Milwaukee to Need-4-Speed in Clearwater Florida for some engine work in mid February 2003. As my experience with Tony at Need-4-Speed has always been excellent, I felt is was worth the 1400 mile drive to leave the vehicle in the hands of someone I trust. The following modifications were performed on the car: Forged ModMax 17cc pistons, forged rods, and Cobra crankshaft bullet-proofed the rotating assembly. A Ford Racing Cobra billet steel flywheel, Spec stage 2 clutch, and Steeda adjustable clutch quadrant provides greater holding power and durability for the increased power. A Vortech power pipe, Accufab Bullitt throttle body, Ford Racing Bullit intake, ModMax stainless steel valves, ModMax valve springs, and stage 3 head porting flow more intake air. New Bassani Mid-length headers and X-Pipe ease the exhaust path. A Canton Oil Pan and Windage tray provide greater oil capacity and minimize crank windage losses. Despite the fact that this car is intended for highway cruising, I also finally decided to upgrade the factory rear end ratio from 3.27 to 3.73. Additional temperature gauges were also added to monitor the air temperature at intake, after the supercharger, and after the intercooler, as well as the intercooler water reservoir temperature. Tony topped this all off with a Dyno tune.
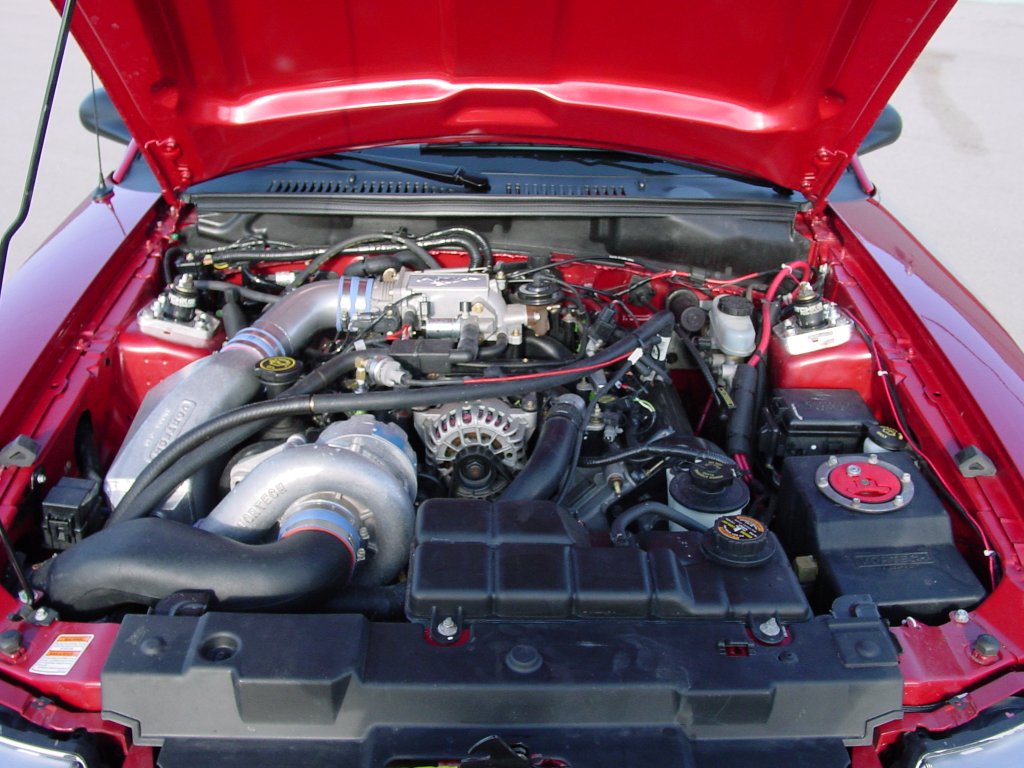
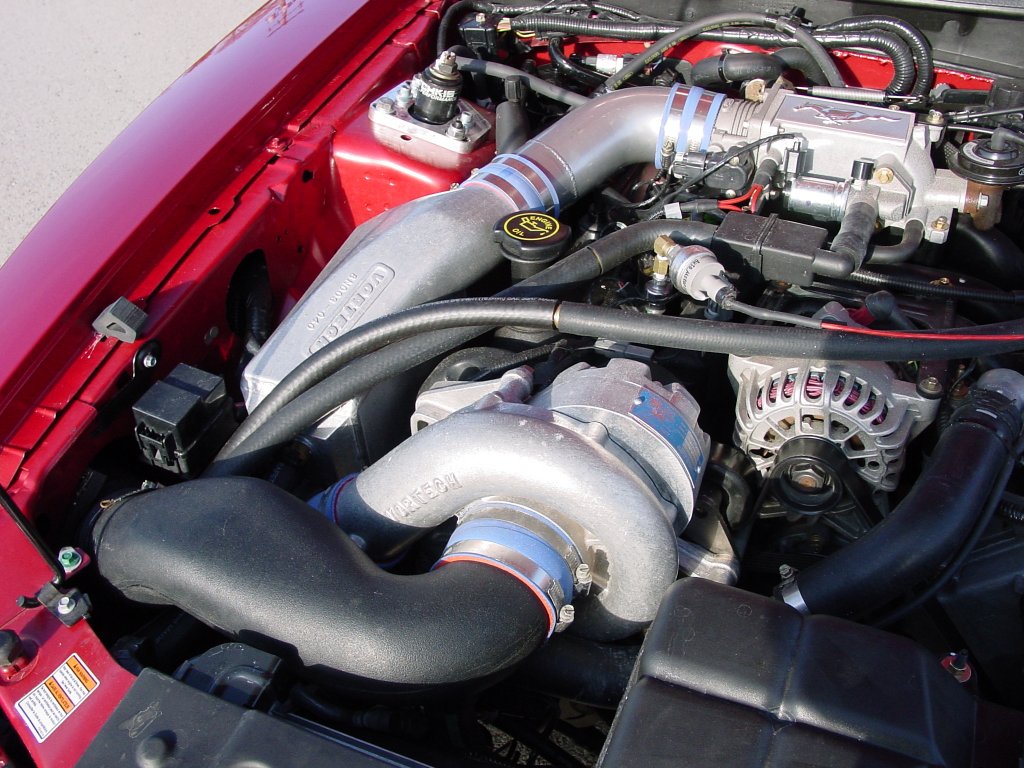
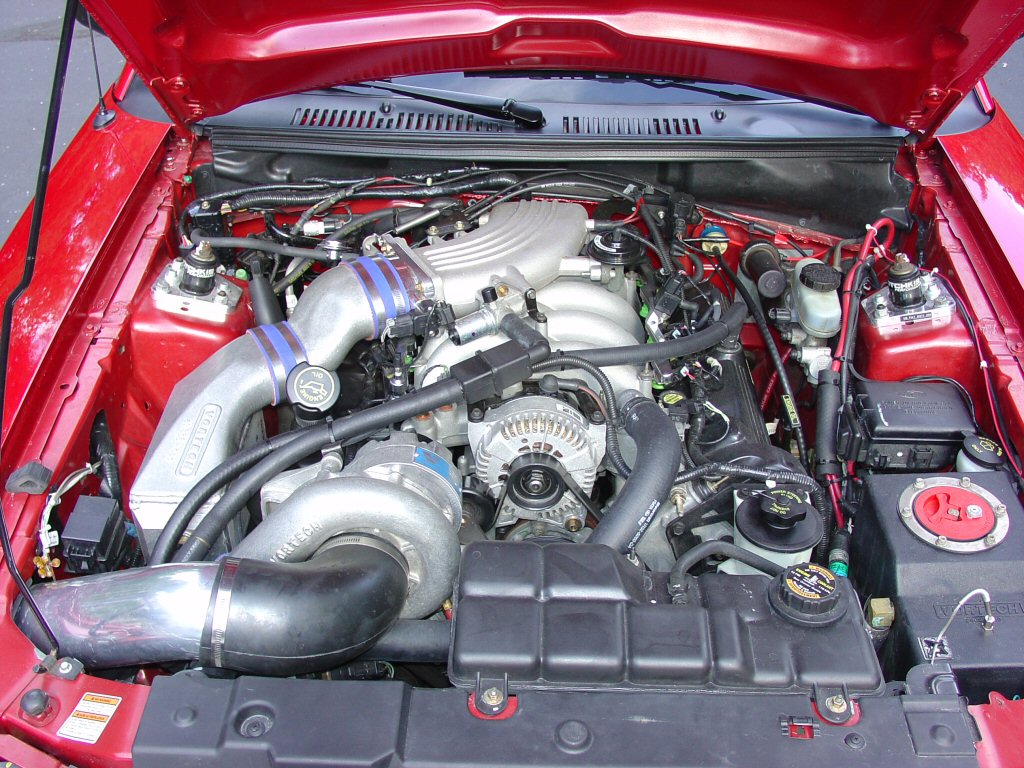
(Click any Image for Larger Picture)
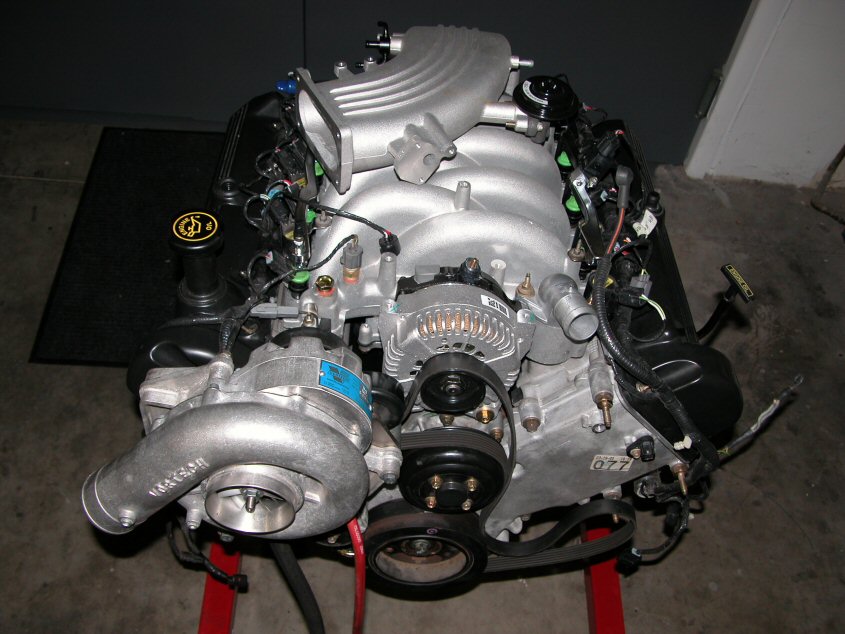
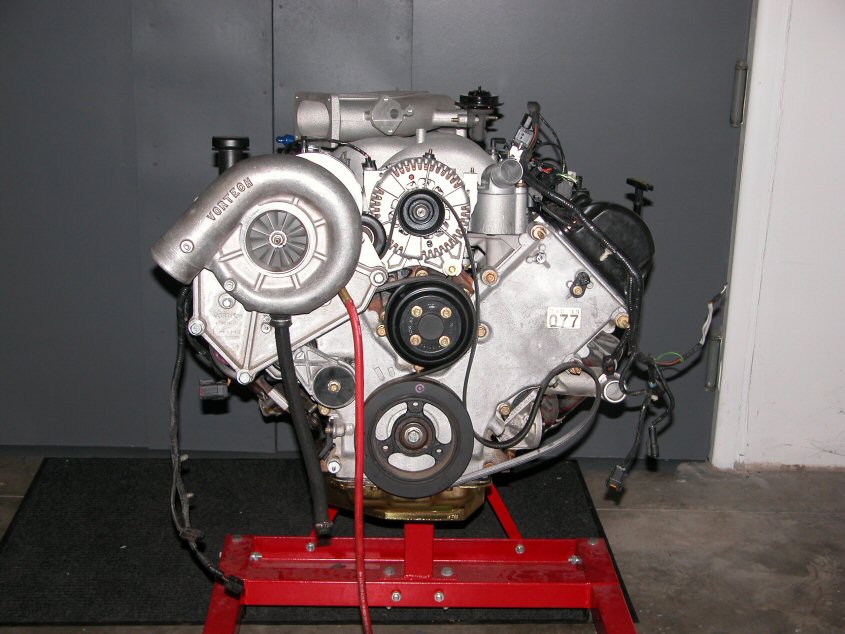
Here is a photo of the modified engine installed in the vehicle. You can easily see the Vortech Power Pipe, Supercharger, Intercooler, Accufab Bullitt Oval Throttle body, and the Bullitt Intake. Note that the exit plenum of the GT style Intercooler had to be cut off and a Bullitt style exit plenum welded onto the intercooler. It was much cheaper to modify the existing intercooler exit (round) to match the Bullitt throttle body (oval) than to purchase an entirely new intercooler (thanx Tony!).
(Click on Image for Larger Photo)
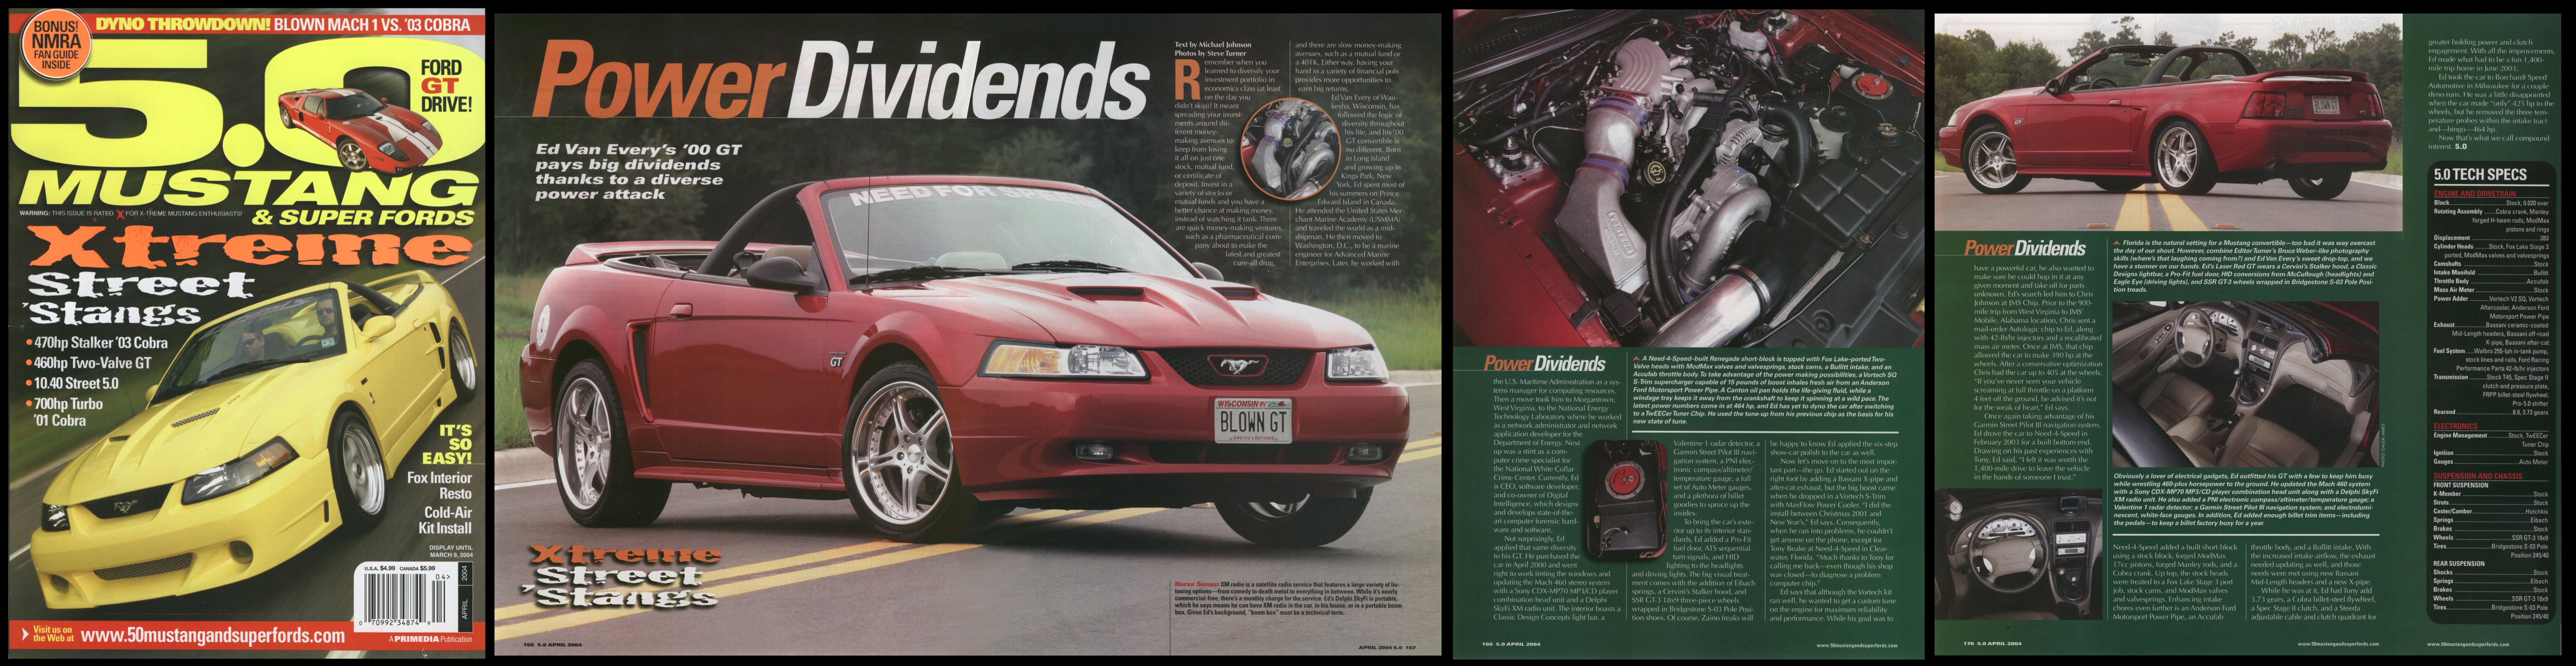
While at Need-4-Speed , the vehicle was delivered to Steve Turner at the 5.0 Mustang and Super Fords Magazine Headquarters in Lakeland Florida for a photo shoot in preparation for a magazine article (see article image at top of page). The vehicle was returned to service the second week of June when its first mission was the 1400 mile drive back from Clearwater to Milwaukee!
2 July 2003: The Dyno Results are in...
I went to Borchardt Speed Automotive in Milwaukee after driving the newly modified vehicle back from Clearwater to get a run on their DynoJet (25 June 2003).
 |
|
| dyno.mpg: 39Mb
(MPEG-2) |
dyno.wmv: 5.4 MB
(Windows Media) |
The dyno indicated 425 RWHP (489 BHP at the engine assuming standard 15% drivetrain loss) which seemed only a minimal gain considering all the modifications. This would result in a net gain of only 20 RWHP with the addition of a Vortech Power Pipe, Accufab Throttle Body, Bullit Intake, Stage 3 Head Porting, Bassani Mid-Length Headers, and a Canton Oil Pan with Windage Tray.
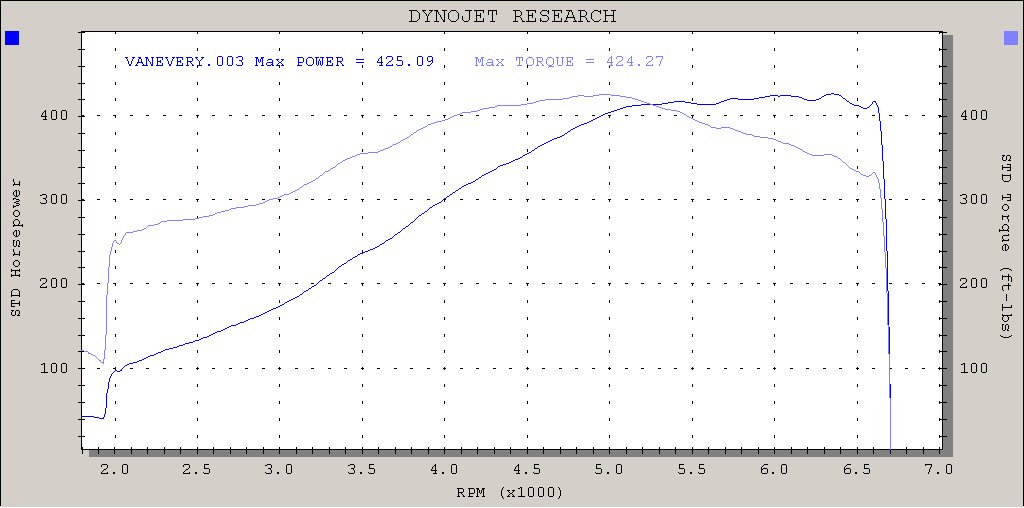
(Click for larger Image)
All-in-all this was a little disappointing. Even with the lowered compression ratio from the new 17cc dished pistons, the vehicle should have been making more power. The only possible cause could be the three temperature probes in the intake path (after air filter, at supercharger outlet, at intercooler outlet). On a hunch, I removed all three probes and went back to the dyno on 2 July 2003:
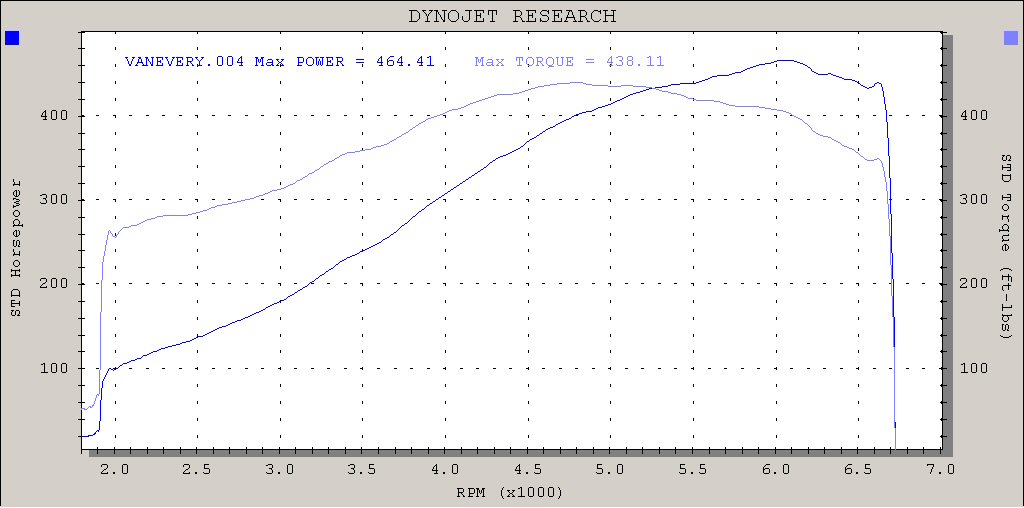
(Click for Larger Image)
Bingo! 464 RWHP (534 BHP at the crank assuming standard 15% drivetrain loss). The three probes in the intake path introduced enough restriction to account for a total of 39 lost RWHP! The air/fuel ratio on this run also dipped a bit rich (11.0:1) at the high end of the RPM band, so there may be a little bit more headroom left for another dyno tune! Obviously, the temperature probes will not be finding their way back into the intake path...
In August of 2003 I removed the Autologic Performance Chip and replaced it with a TwEECer EEC Tuner Chip. The TwEECer provides the opportunity to store 4 different engine tuning profiles, update any of those profiles via a USB cable without having to remove the EEC Comuputer or the TwEECer from the vehicle, and to make/store engine tuning modification profiles directly on my own PC. Mike Glover at STKR (Slower Traffic Keep Right) provides great customer service for this product and even extracted the existing engine tuning profile from my Autologic chip for direct import into the TwEECer. Not only does this give the ability to do my own custom tuning, but it also provides direct access to the baseline that was on my Autologic chip as a starting point for making any modifications. This is a great way to preserve all the custom dyno tuning I had paid for in the past and still allow me to move forward with additional tuning modifications if I so desire.